Deploy document store with web app
This guide shows how to deploy a document store using one of the available web applications.
Currently, there are two web applications:
In this tutorial, you will use the first web app.
Prerequisites
- Google Chrome web browser
- MetaMask extension in Google Chrome
Change MetaMask network
Perform these steps to connect MetaMask to the network you want to use:
- Open the OpenCerts Admin Portal in Google Chrome. On the Welcome page, click MetaMask.

-
On the Chrome address bar, click Extensions. Select MetaMask.
If prompted, log in with your user credentials.
-
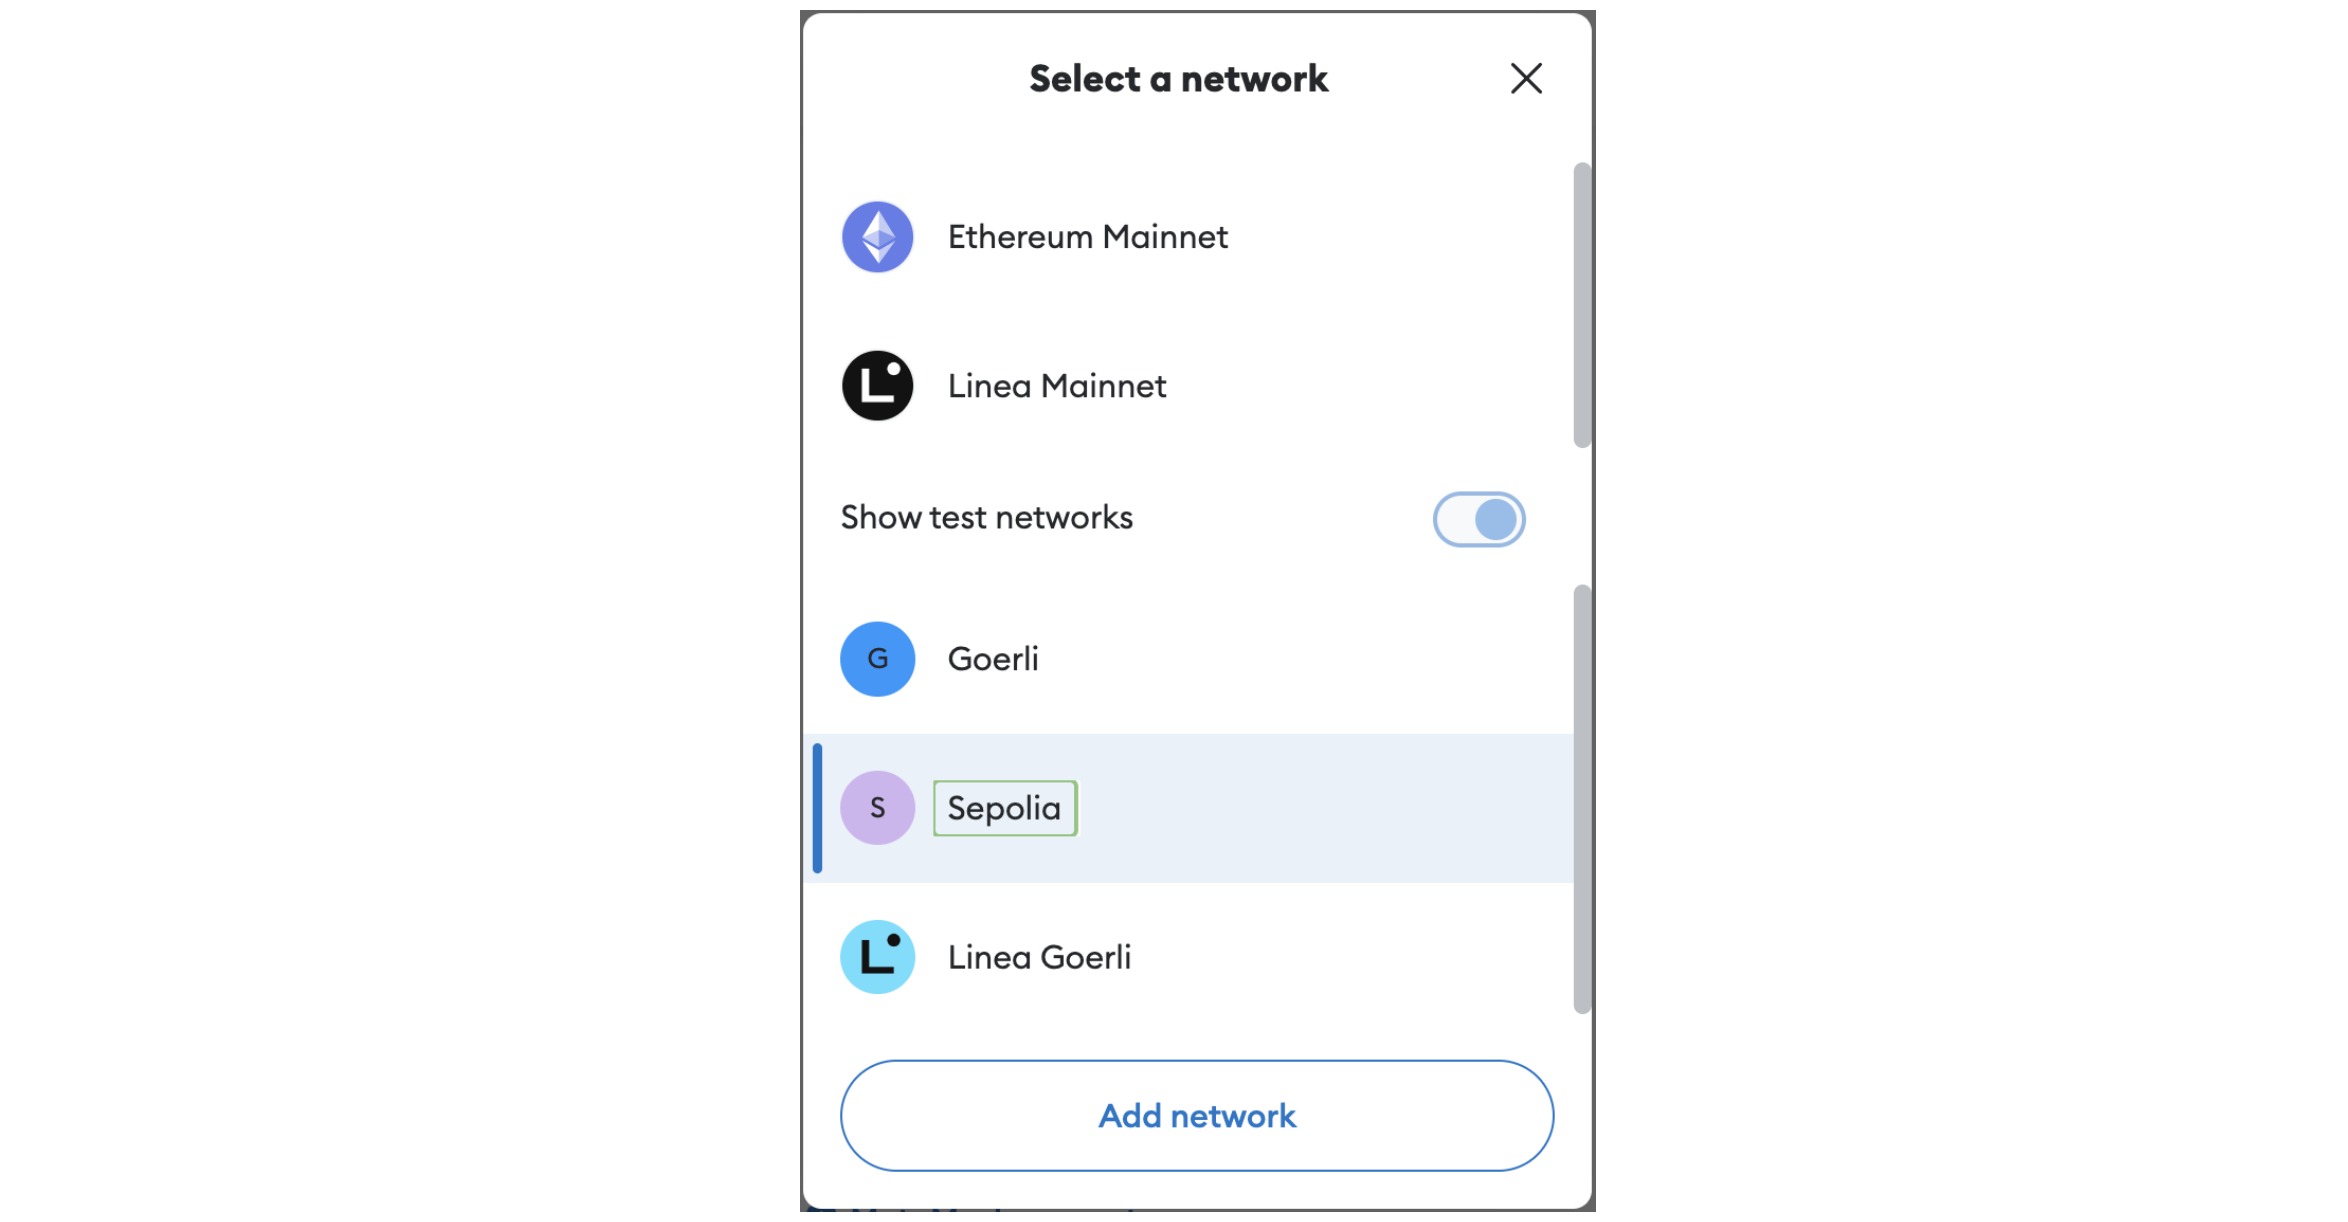
Choose Show test networks.
-
Select Sepolia from the list.
Connect MetaMask to web app
To interact with the OpenCerts Admin Portal web app, you will need to connect your MetaMask wallet.
- Open the OpenCerts Admin Portal in Google Chrome. On the Welcome page, click MetaMask.
-
On the Chrome address bar, click Extensions. Select MetaMask.
If prompted, log in with your user credentials.
-
Select a wallet and click Next.
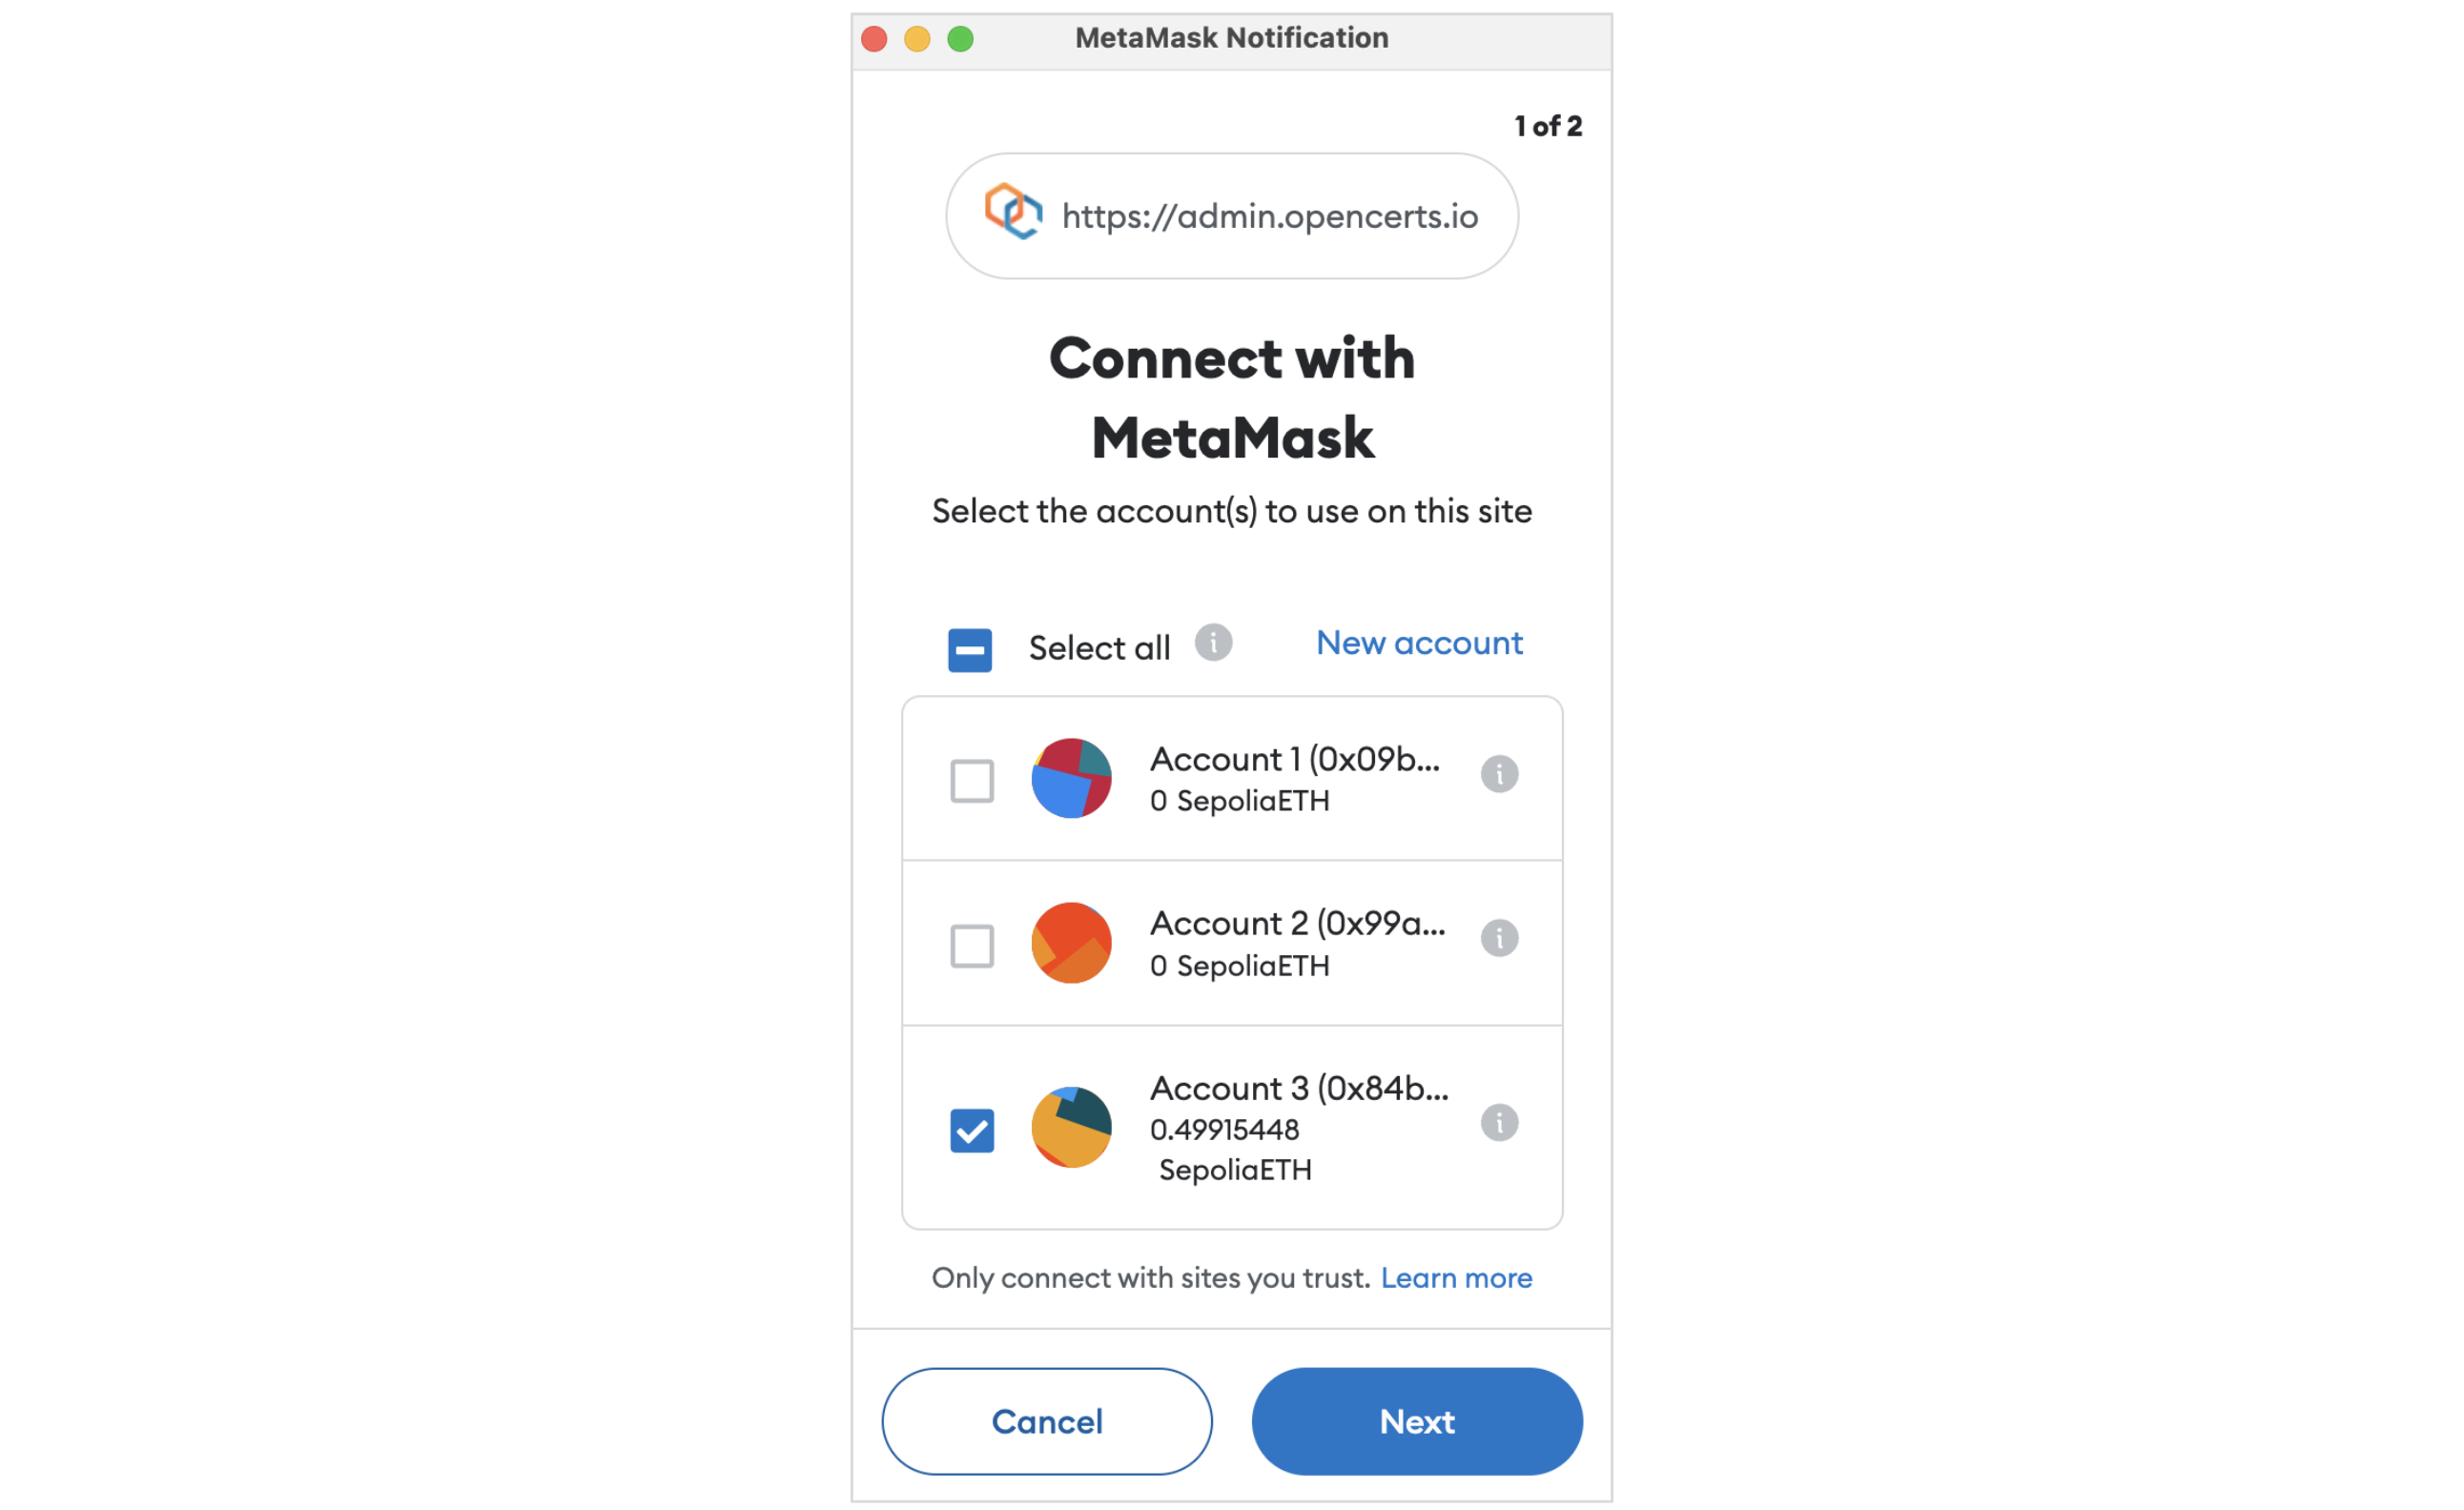
- Click Connect to make the web app interact with the MetaMask wallet.
Deploying Document Store Smart Contract
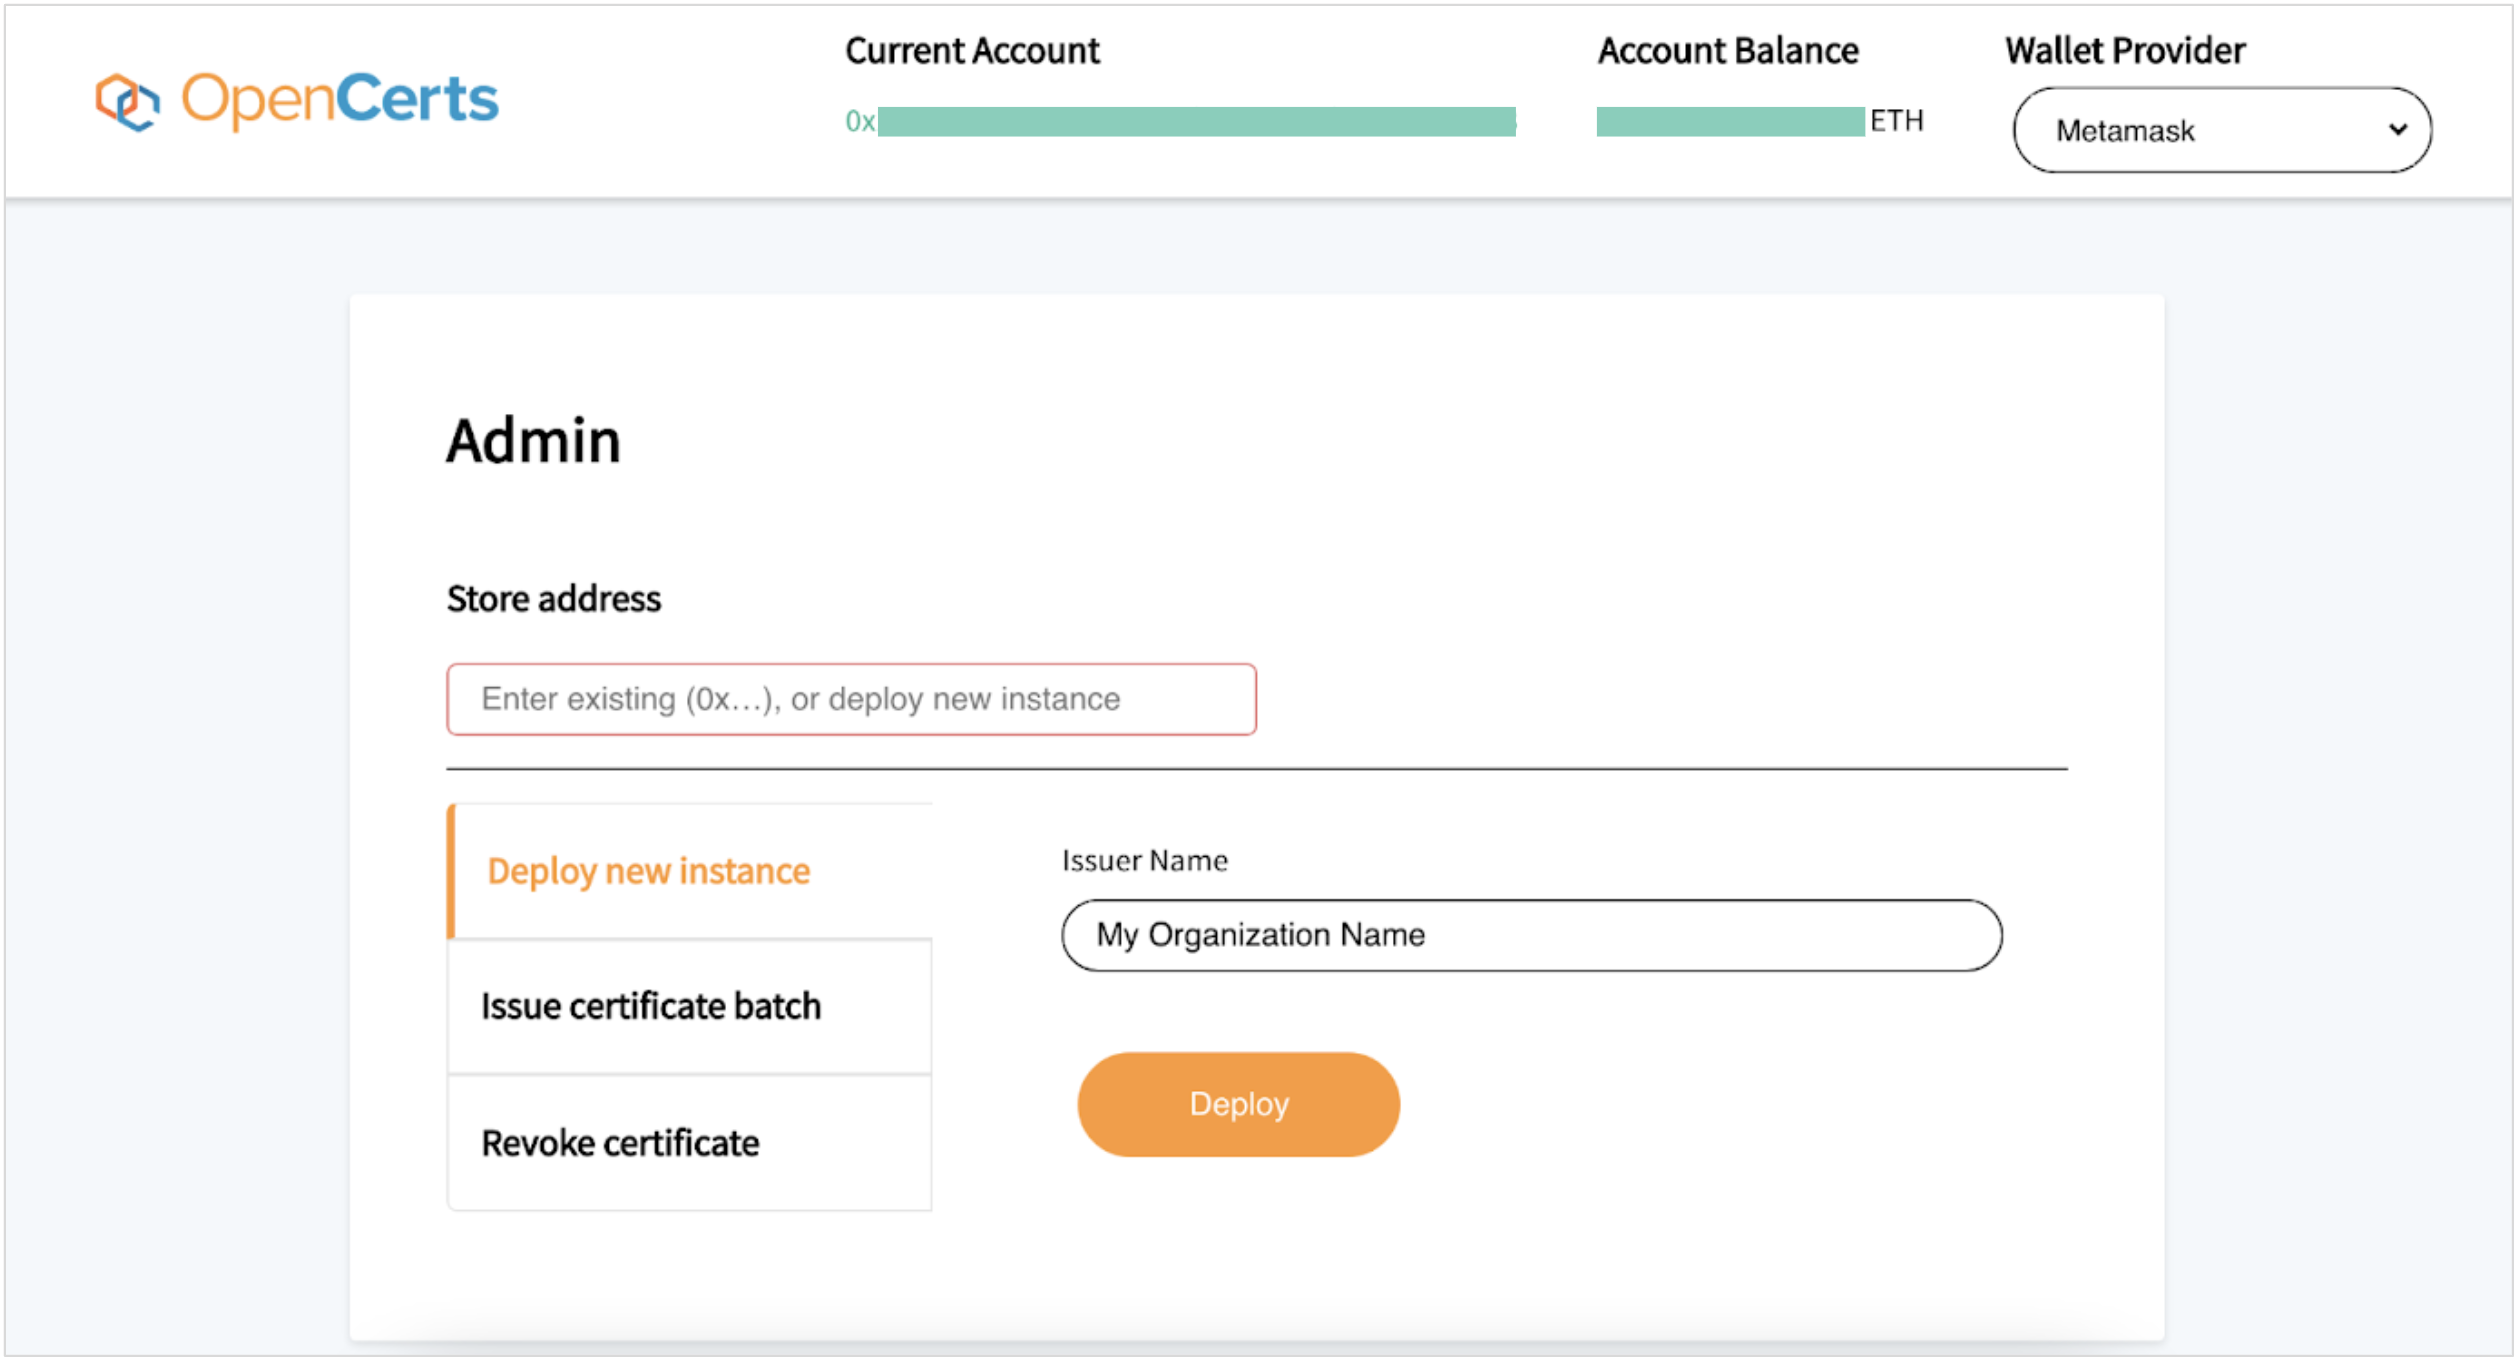
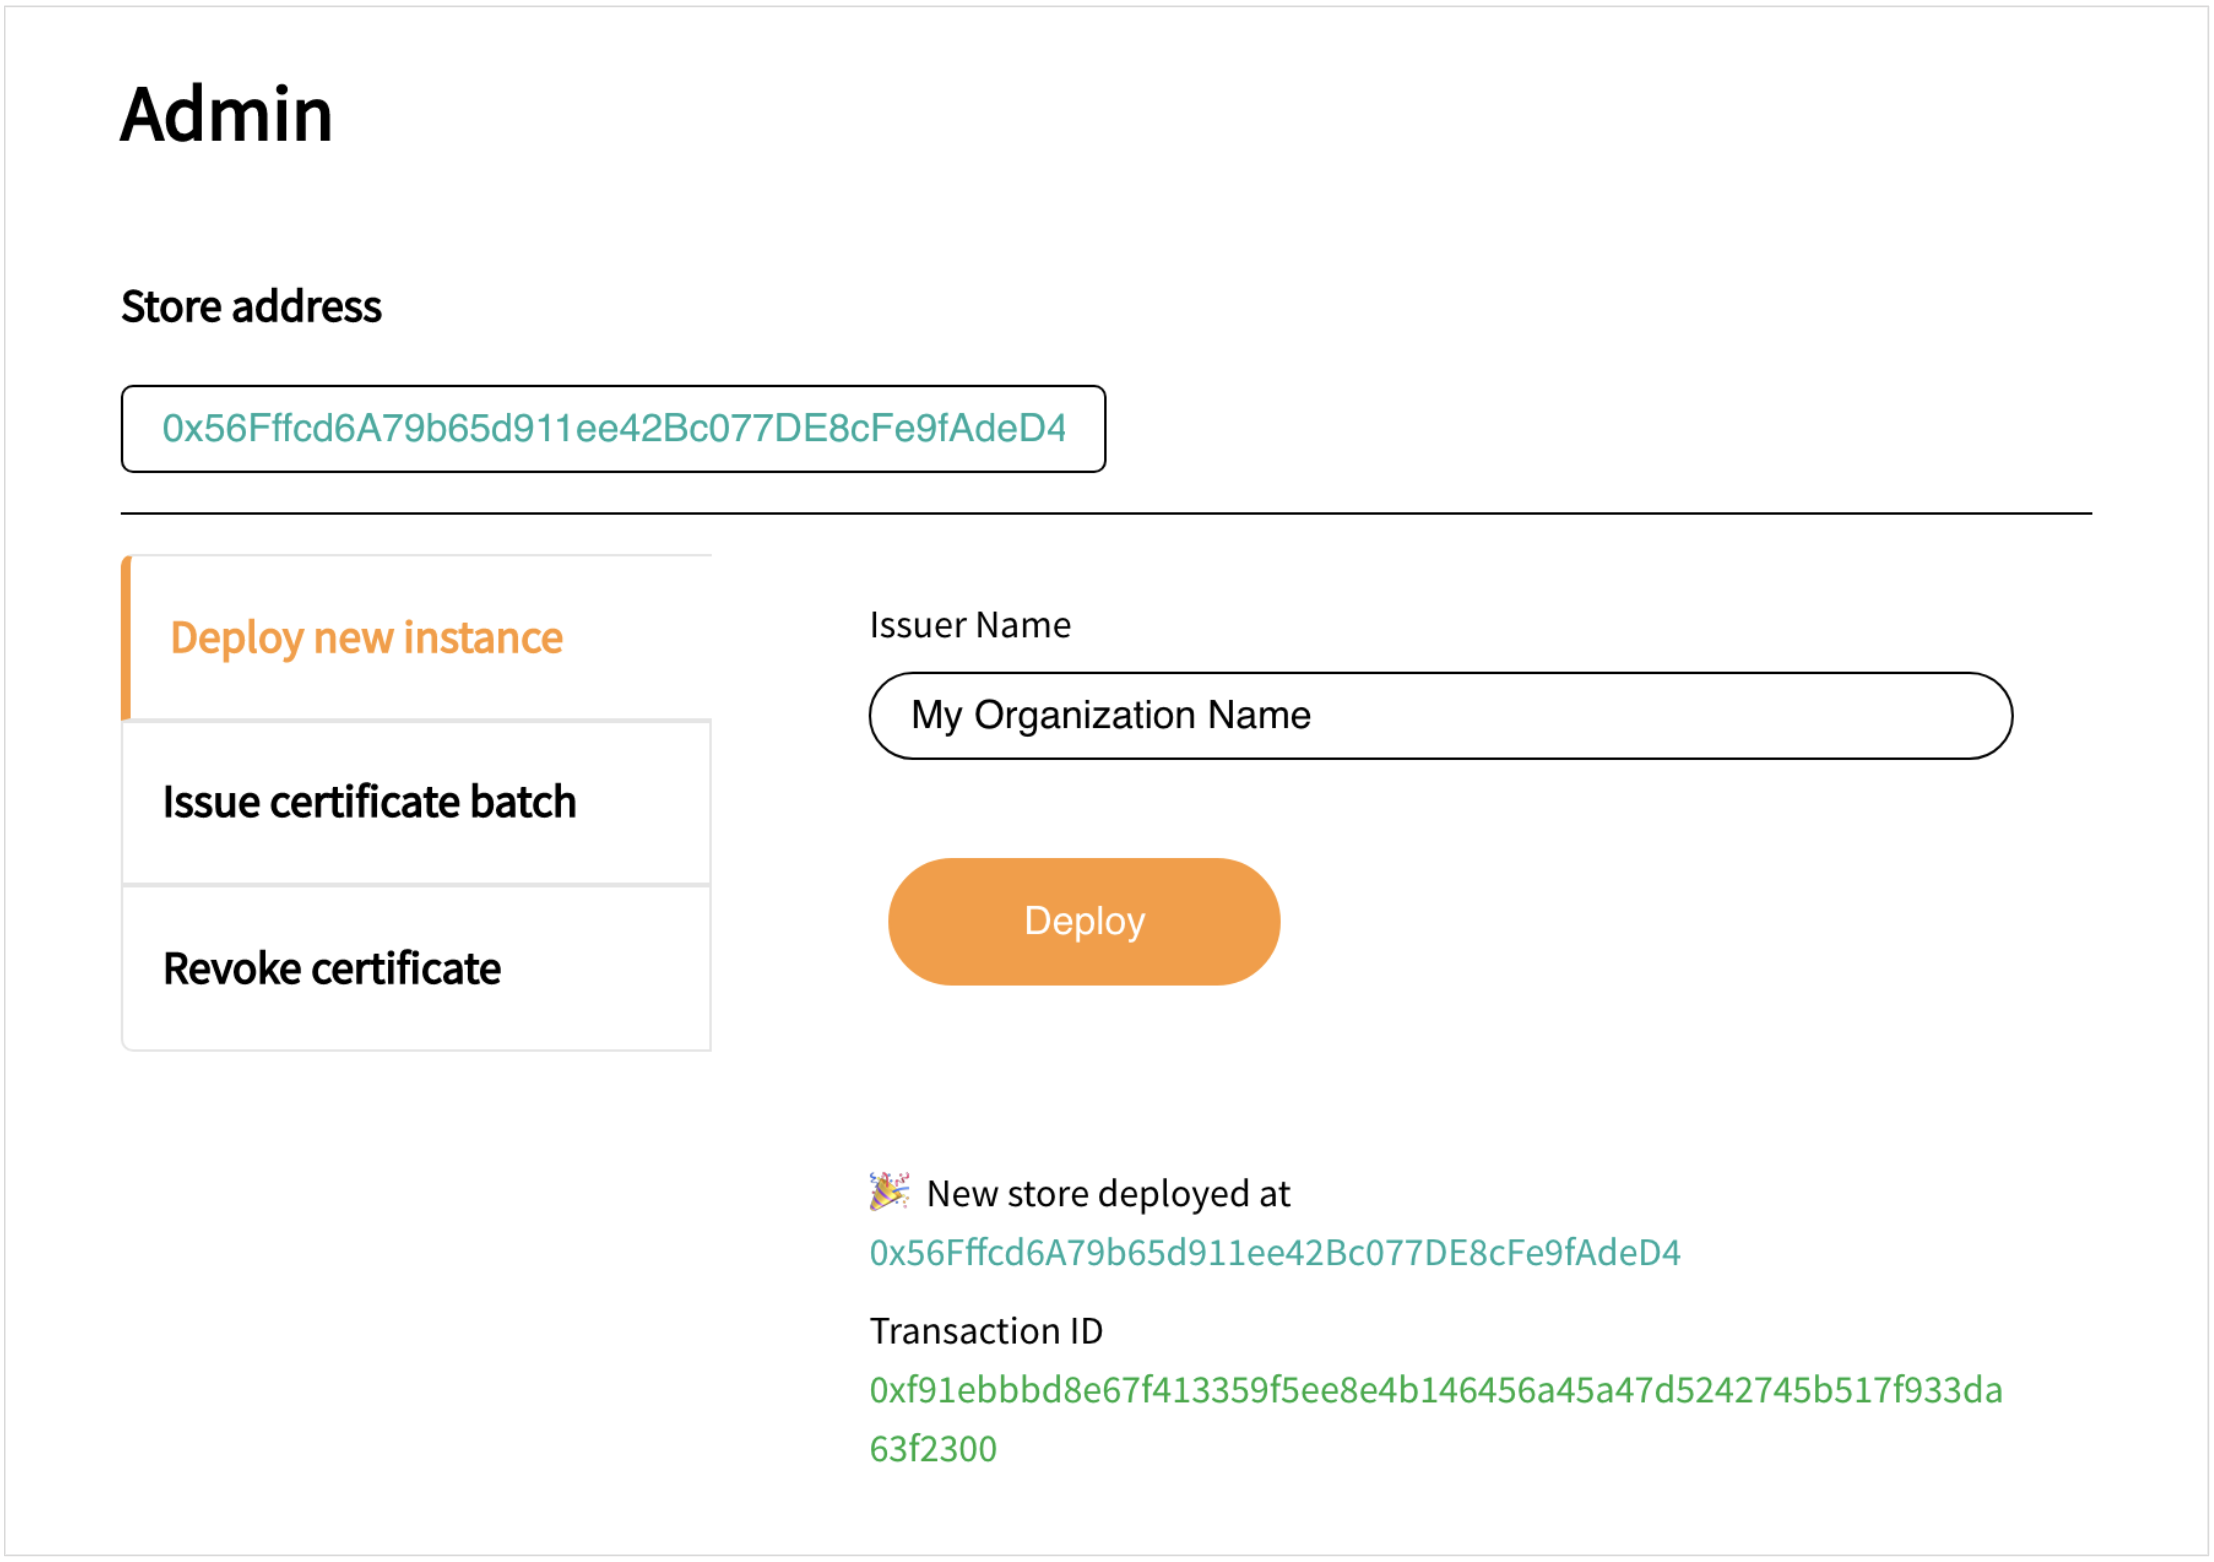
- In the OpenCerts Admin Portal, enter your organization name into the Issuer Name field.
-
Click Deploy to deploy the document store as an Ethereum smart contract.
-
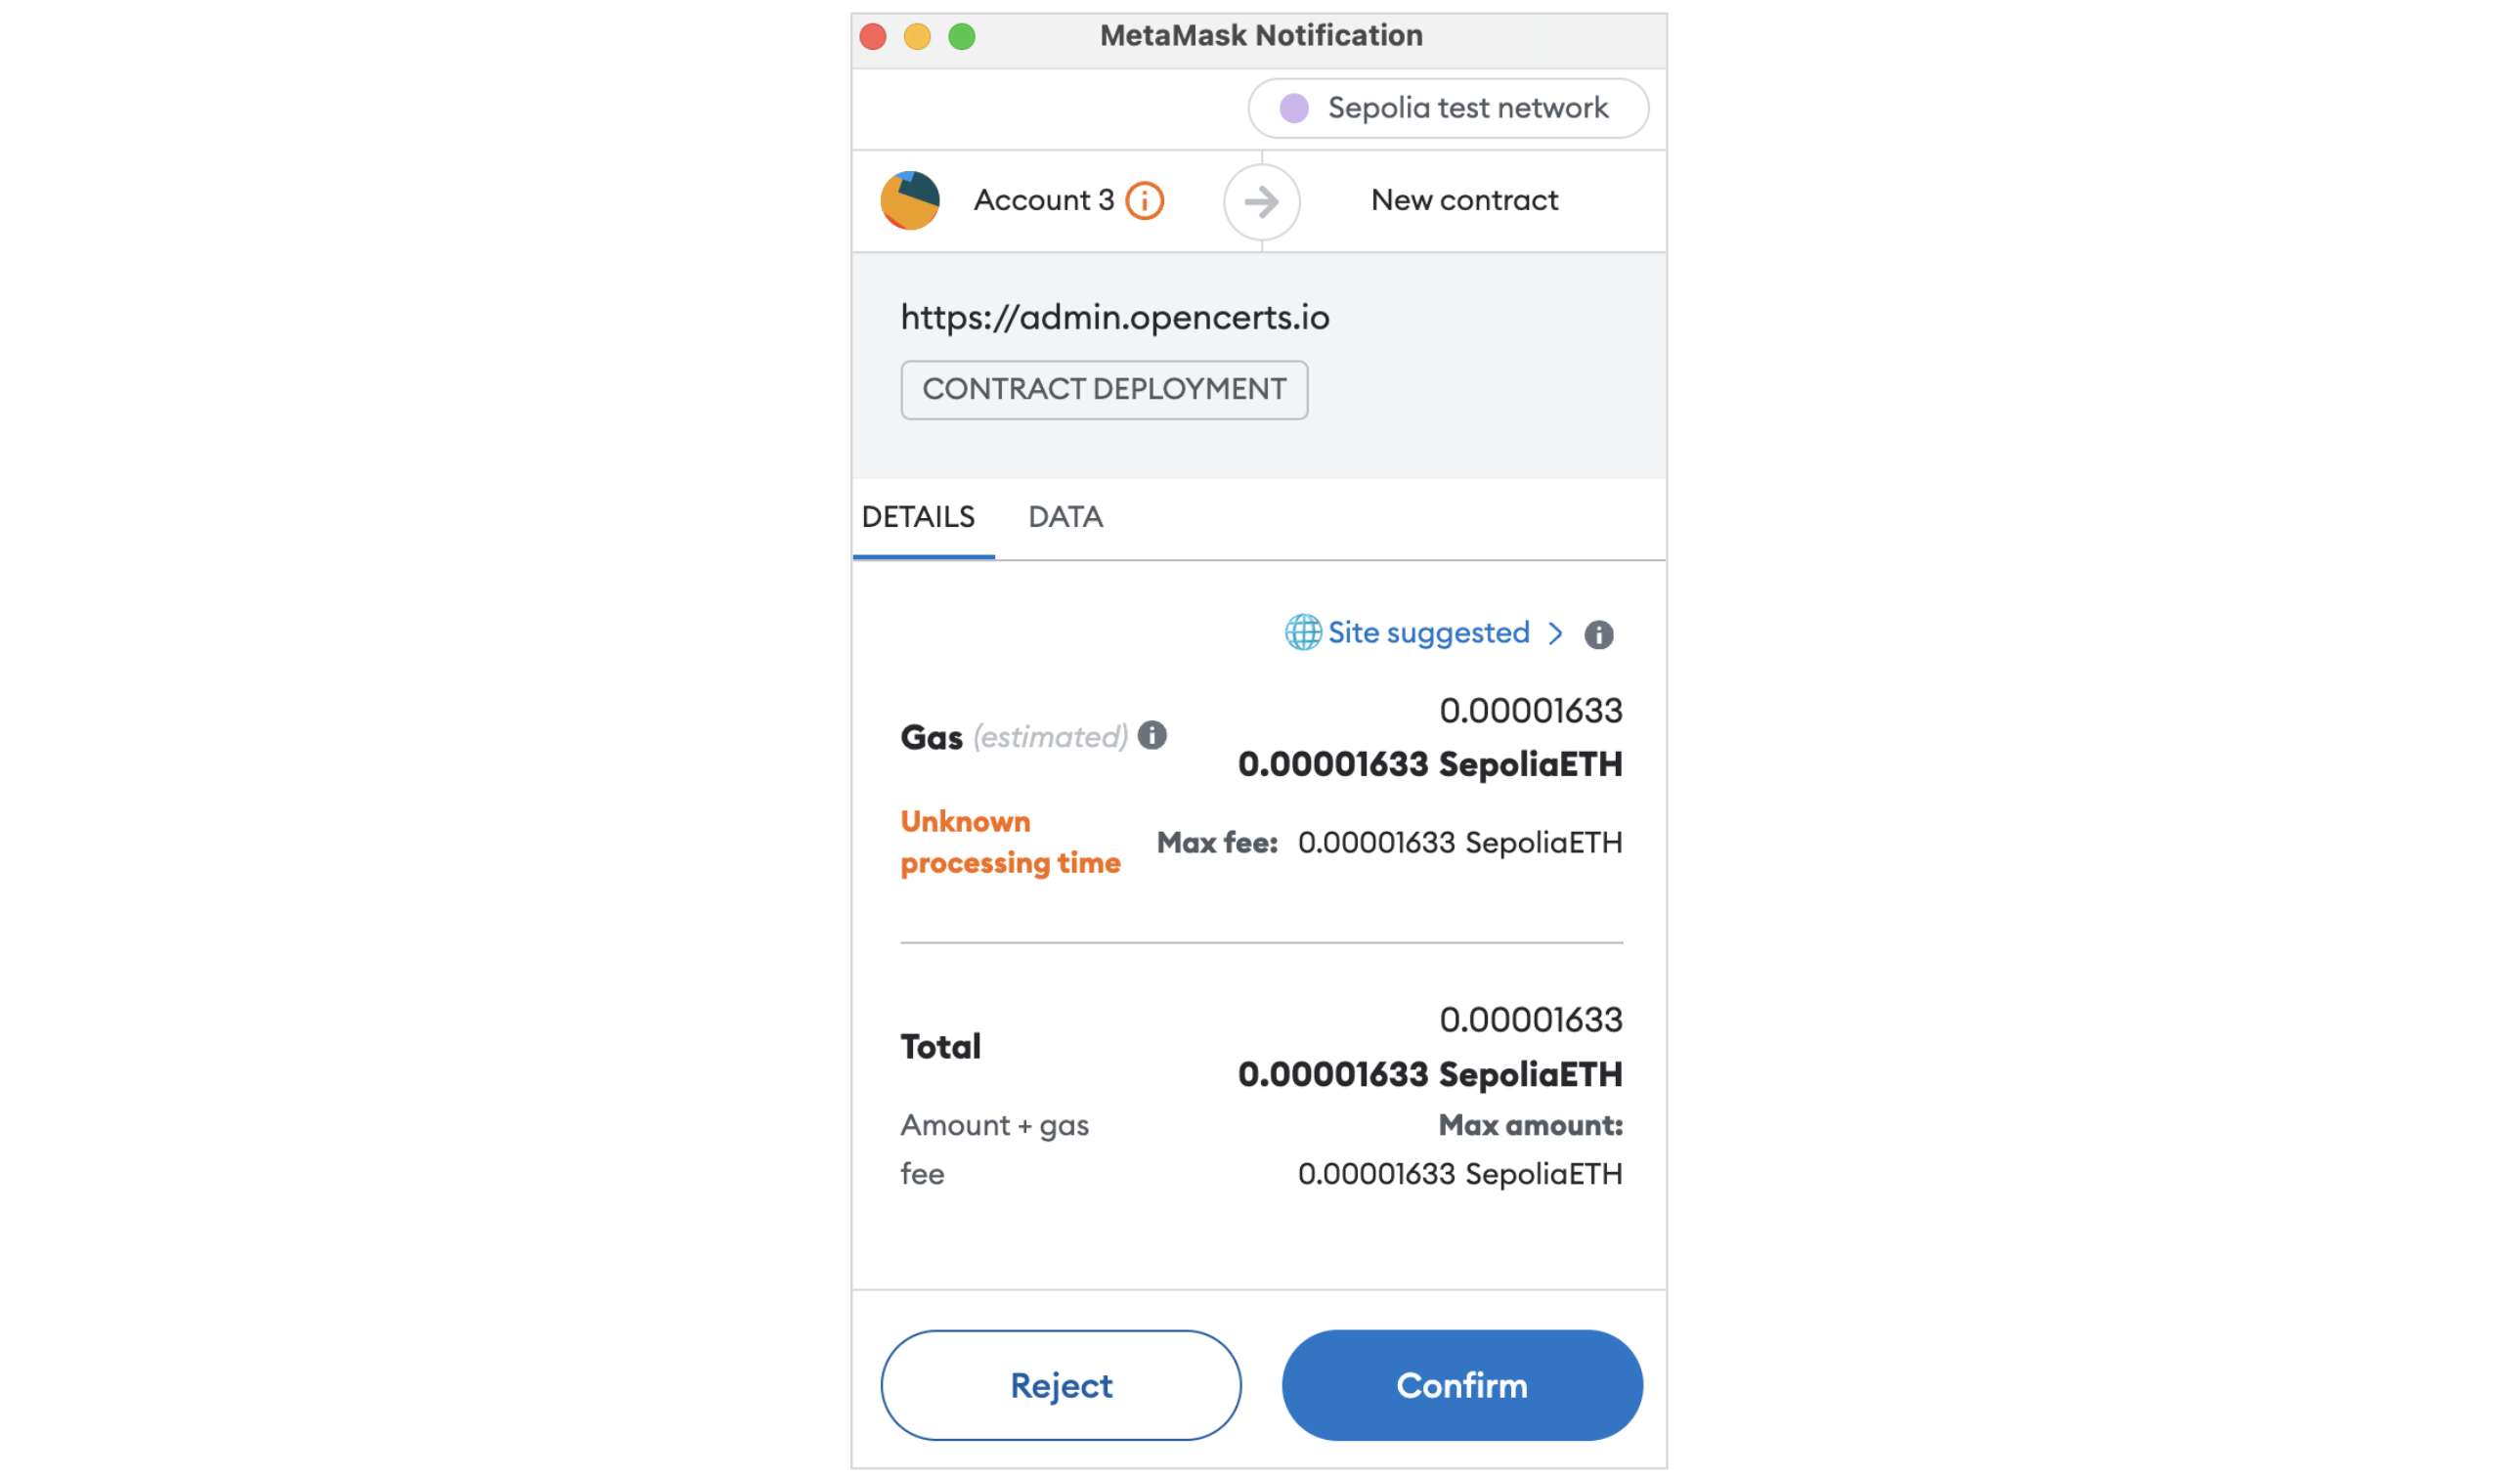
After that, you will be asked to confirm the transaction in a pop-up dialog. Click Confirm to continue.
-
Once your document store smart contract has been successfully deployed, a success message "New store deployed at..." will display with the document store address.
In the example below, the document store address is
0x56Fffcd6A79b65d911ee42Bc077DE8cFe9fAdeD4. Do not use the Transaction ID.
Important: Save the document store address somewhere, as the web app does not keep track of your document store addresses.
Additional reading
You will find more details about document store on this page.